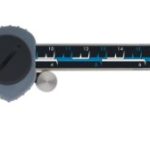
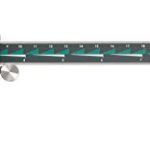
Brown & Sharpe 599-579-5 Dial Caliper, Stainless Steel, Black Face, 0-6″ Range, +/-0.001″ Accuracy, 0.001″ Resolution, Meets DIN 862 Specifications
The Brown & Sharpe Dial-Cal dial caliper has a 1.25″ diameter rotating dial with a lock, is made of stainless steel, and measures in inches. The covered rack helps prevent measurement error by protecting the gear from foreign matter. Linear accuracy meets Deutsches Institut für Normung (DIN) 862 standards. These calipers are for use in measuring inside dimensions (ID), outside dimensions (OD), depth and step.
The caliper measures 0.100″ per revolution of the dial. The lock screw locks the dial and holds the sliding jaw in position. Adjustable zero set allows the user to set zero at a convenient distance. The depth rod is integrated into the rack of the caliper, unlike many calipers that offer a detachable depth rod, or none at all. The hardened stainless steel components, including the bar, measuring surfaces, rack, gears, and depth rod, offer corrosion resistance, increased accuracy, and long life. Spring anti-backlash control offers increased accuracy over standard gear configurations. Backlash is the amount of clearance between mated gear teeth in the caliper controls, which prevents the gear teeth from jamming. It is undesirable to have much backlash due to the lack of precision offered by the increased amount of play between gears. Certain gear designs can minimize or eliminate backlash; spring anti-backlash systems use a spring to add a compressive force, thereby minimizing backlash.
Calipers measure the distance between two opposing sides of an object. They make inside, outside, depth, or step measurements, according to their type. Calipers are commonly used in architecture, metalworking, mechanical engineering, and machining. The simplest calipers have two legs to mark the two points and require a ruler to take the measurement. More complex calipers use two sets of jaws instead of legs and have up to two graduated scales. Vernier, dial, and digital calipers give direct and accurate readings and are functionally identical, having a calibrated scale with a fixed jaw, and another jaw with a movable pointer that slides along the scale. The vernier caliper has a scale sliding parallel to the main scale for an additional, fractional reading to improve measurement precision. The dial caliper has a circular dial with a pointer on a toothed gear rack replacing the second vernier scale. As with the vernier, this second measurement is added to the reading from the main scale to obtain the result. The digital caliper takes a differential by zeroing the display at any point along the slide, with an LCD that displays a single value in English and/or metric units.
Brown & Sharpe manufactures precision measuring equipment and metrology hand tools. The company, founded in 1833, played a key role in setting industrial standards in the United States. Brown & Sharpe was acquired by Hexagon Metrology in 2001 and is headquartered in North Kingstown, RI.
- Precise dial graduations of 0.001″, with one revolution equivalent to 0.100″
- Hardened stainless steel construction for corrosion resistance and long life
- 1.25″ diameter rotating dial has a lock screw to hold the sliding jaw in position, to help ensure consistent measuring
- Covered rack keeps foreign matter from clogging the gear, to help prevent measurement error
- Linear accuracy meets DIN 862 standards

